
In this ASP.NET Core Web API tutorial, you will learn how to build a REST API in ASP.NET Core 8 with step-by-step instructions. This beginner-friendly .NET API tutorial covers CRUD operations, controllers, and practical examples. Also, we will create a .NET 8 API example that demonstrates how a controller works in ASP.NET Core. This REST API step-by-step guide in .NET will help you understand the basic flow of Web API development.
Build a REST API in ASP.NET Core 8 (Complete Step-by-Step Guide)
ASP.NET Core 8 makes it incredibly easy to build fast, modern, and scalable REST APIs. Whether you’re creating a small application or a large enterprise project, REST APIs remain the foundation of backend development in 2025.
In this tutorial, you will learn:
- How to create an ASP.NET Core 8 Web API project
- How to build a controller
- How to add a model and service
- How to implement CRUD operations
- How to test the API using Swagger
Let’s begin.
 What is a REST API?
A REST API (Representational State Transfer) is a web service that allows applications to communicate using HTTP methods like:
- GET → Read data
- POST → Create data
- PUT → Update data
- DELETE → Remove data
ASP.NET Core 8 provides built-in support for REST APIs using controllers and minimal APIs.
 Step 1: Create a New ASP.NET Core 8 Web API Project
Open Visual Studio 2022 → Click:
Create a new project → ASP.NET Core Web API
Select:
- .NET 8 (LTS)
- Leave Enable OpenAPI Support checked (important for Swagger)
Click Create.
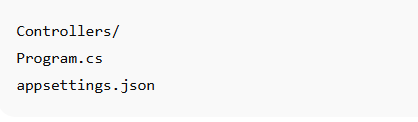
Your project will have this structure:
 Step 2: Create a Model Class
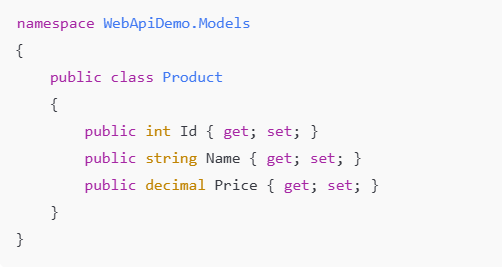
Create a folder named Models, then add a class:
 Models/Product.cs
 Step 3: Create a Service (Business Logic Layer)
Create a new folder Services → Add interface and class.
Services/ProductService.cs
using WebApiDemo.Models;
namespace WebApiDemo.Services
{
public class ProductService : IProductService
{
private readonly List _products = new()
{
new Product { Id = 1, Name = “Keyboard”, Price = 500 },
new Product { Id = 2, Name = “Mouse”, Price = 300 }
};
    public List<Product> GetAll() => _products;

    public Product GetById(int id) =>
        _products.FirstOrDefault(p => p.Id == id);

    public Product Add(Product product)
    {
        product.Id = _products.Max(x => x.Id) + 1;
        _products.Add(product);
        return product;
    }

    public Product Update(Product product)
    {
        var existing = GetById(product.Id);

        if (existing == null) return null;

        existing.Name = product.Name;
        existing.Price = product.Price;

        return existing;
    }

    public bool Delete(int id)
    {
        var product = GetById(id);
        if (product == null) return false;

        _products.Remove(product);
        return true;
    }
}
}
 Step 4: Register the Service in Program.cs
Open Program.cs and add:

This enables Dependency Injection.
 Step 5: Create the API Controller
Create a new folder Controllers → Add:
Controllers/ProductController.cs
using Microsoft.AspNetCore.Mvc;
using WebApiDemo.Models;
using WebApiDemo.Services;
namespace WebApiDemo.Controllers
{
[ApiController]
[Route(“api/[controller]”)]
public class ProductController : ControllerBase
{
private readonly IProductService _service;
    public ProductController(IProductService service)
    {
        _service = service;
    }

    [HttpGet]
    public IActionResult GetAll() => Ok(_service.GetAll());

    [HttpGet("{id}")]
    public IActionResult GetById(int id)
    {
        var product = _service.GetById(id);
        if (product == null) return NotFound();
        return Ok(product);
    }

    [HttpPost]
    public IActionResult Add(Product product)
    {
        var newProduct = _service.Add(product);
        return CreatedAtAction(nameof(GetById), new { id = newProduct.Id }, newProduct);
    }

    [HttpPut("{id}")]
    public IActionResult Update(int id, Product product)
    {
        product.Id = id;
        var updated = _service.Update(product);

        if (updated == null) return NotFound();

        return Ok(updated);
    }

    [HttpDelete("{id}")]
    public IActionResult Delete(int id)
    {
        var deleted = _service.Delete(id);
        if (!deleted) return NotFound();

        return Ok("Deleted successfully");
    }
}
}
 Step 6: Test the API Using Swagger
Run the project → Swagger UI opens automatically:
https://localhost:xxxx/swagger
Try:
- GET
/api/product - POST
/api/product - PUT
/api/product/{id} - DELETE
/api/product/{id}
Your REST API is now fully functional!
Output Examples
 GET response:
[
  { "id": 1, "name": "Keyboard", "price": 500 },
  { "id": 2, "name": "Mouse", "price": 300 }
]
FAQ Section
1. What is REST API in ASP.NET Core?
REST API is a service built using HTTP protocols that follows REST principles for CRUD operations.
2. How do I test ASP.NET Core API?
You can use Swagger, Postman, or any API testing tool.
3. Is ASP.NET Core 8 good for APIs?
Yes, .NET 8 provides minimal APIs, performance improvements, and built-in OpenAPI support.
4. Should beginners learn ASP.NET Core API?
Absolutely — it is widely used in enterprise applications.